Appearance
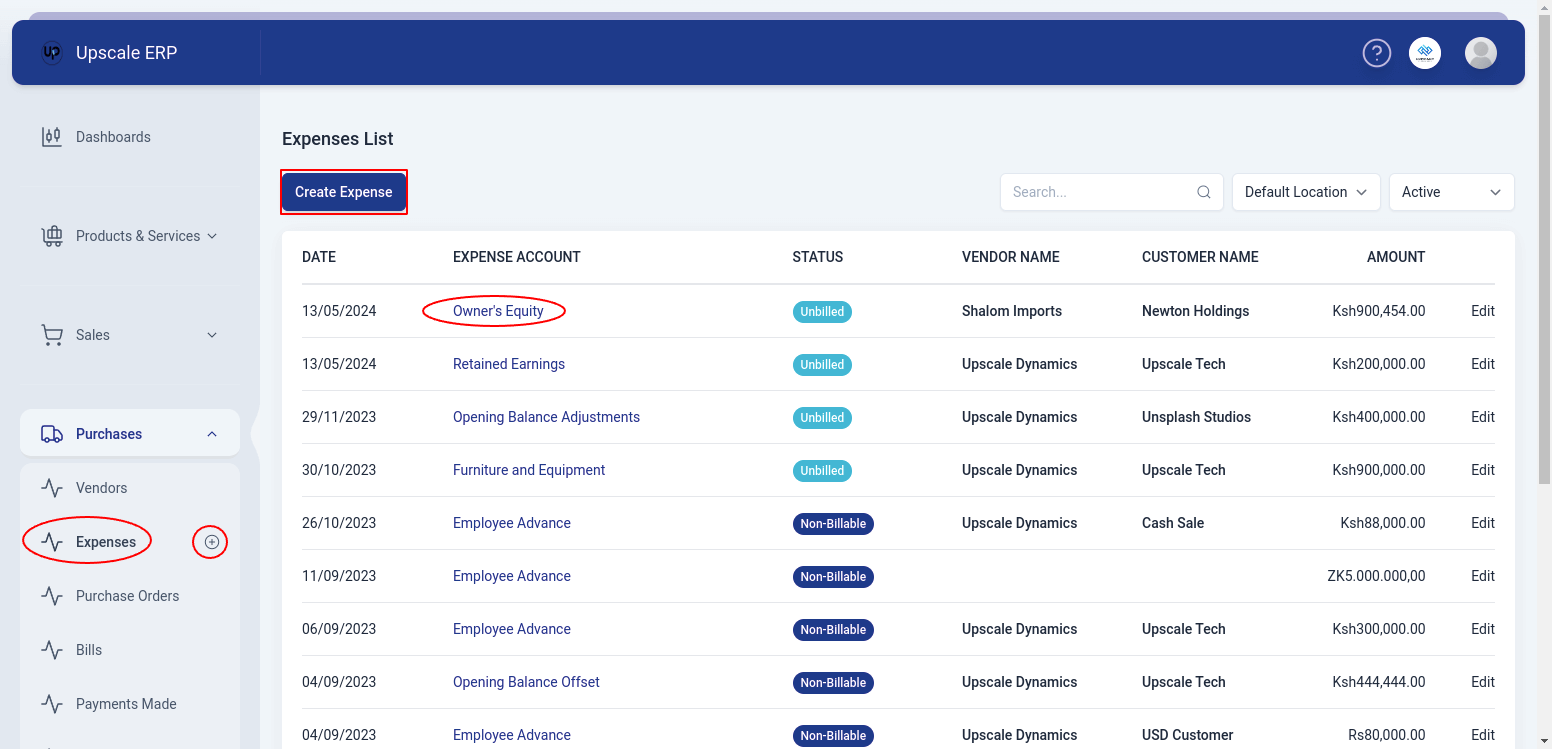
Expenses
Expenses are costs associated with operating an organization are called expenses. They may be incurred for a variety of routine business expenses, such as housing, meals, and travel. Within an organization, users may be able to reimburse some of these costs.
Creating an Expense
To create an expense,
Navigate to the Purchases module on the sidebar, and click on the 'Expenses' section.
Click on the 'Create Expense' button on the expense list page.
TIP
Alternatively,a shortcut that can be used is to click on the plus sign next to Expenses on the side bar and it will take you to the create page.
When you get to the "create" screen,fill in the required details i.e paid through, expense account, amount
When you're finished, click 'Save' or if you want to save and create another expense, select 'Save and New' from the dropdown .
Fields found in the Expense Create Page
| Field Name | Description |
|---|---|
| Expense Date | Date of the expense. |
| Paid Through | Account used to pay for the expense. |
| Currency | Medium of exchange used to pay for the expense. |
| Expense Account | Account used to track and record that expense incurred by the organization. |
| Amount | The price of the expense. |
| Tax | Tax charged on the expense. |
| Notes | Notes to be displayed for the expense. |
| Vendor | Choose the vendor responsible for the expense incurred. |
| Reference No | Unique identification number assigned to the expense. |
| Customer Name | Choose customer name whose revenue is being used to cover the expenses. |
Single and Itemized Expense Views
When creating an expense,you will come across a toggle that you can switch on and off depending on whether you want a single and itemized expense view.
Single Expense View
A single expense view lets you to create an overview of a single expense entry, and displays content that includes:Expense account,amount,tax and notes.It is useful for quick reviewing of individual expenses without going into detailed line items.

Itemized Expense View
An itemized expense view on the other hand, lets you to provide a detailed breakdown of the individual components contributing to that expense. It is useful when you need a thorough understanding of how the total expense amount is distributed across various items, such as different products or services purchased.
For example,if the expense being created is a sandwich,in the itemized expense view you break it down into bread,tomatoes,onions,cheese and chicken.

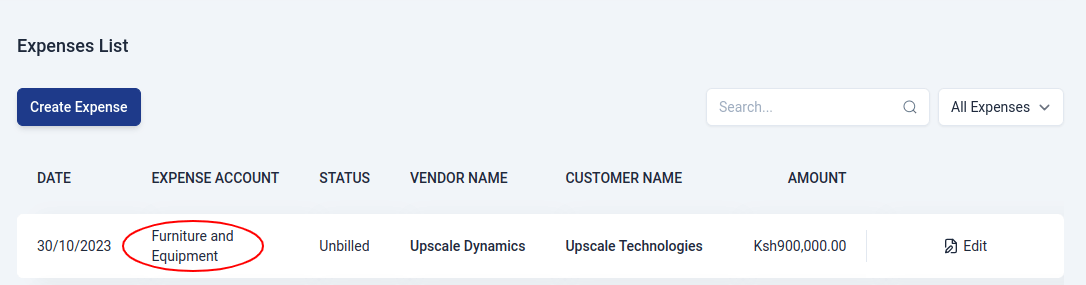
Viewing an Expense
To view an expense, click on the expense account on the list page and that will take you to the expense details view page.
The view page has a number of sections that include:
- General Details
Details including Branch, Account, Expense Date, Status, Customer, and Paid To are displayed in this area. If user ticked on the option 'Billable to customer?' then status of the expense will display 'Unbilled' otherwise if not,the status will be 'Non-billable'.
- Expense Amount
Depending on what a user chose on the create page, an expense amount can be 'Tax inclusive' or 'Tax exclusive'.Payment details are shown here,such as, Subtotal,Tax and Total Amount.
- Expense Details
Details like Expense Account, Tax Amount, Notes, Tax and Amount are displayed here.
The View Page Features

The expense view page has features that include:
- New Feature
This feature simply lets the user to create a new expense.
- Edit Feature
The edit feature lets a user to change details of an already existing expense.
Deleting an Expense
To delete an expense, go to the expense view page, click on the downward arrow and select 'Void Expense', if sure about deleting, click ok. The status will change to 'deleted'.