Appearance
Credit Notes
A credit note is a document issued by a vendor to a customer, acknowledging that a specific amount has been credited to the customer's account. This typically occurs when items are returned after a sale due to reasons such as defects or dissatisfaction with the product. The credit note serves as a record of the return and the amount that can be used against future purchases or refunded.
To maintain accurate and transparent record-keeping, it is recommended to link the appropriate invoices to their corresponding credit notes. This linkage provides a clear trail of returned items and ensures precise financial records.
Example:
Suppose you sell two items to a customer for a total of 50k—one priced at 30k and the other at 20k. If the customer returns the 20k item and replaces it with one worth 25k, here's the process to follow:
- Create a Credit Note - Issue a credit note for 20k from the original invoice to reflect the returned item.
- Create a New Invoice - Generate a new invoice for the replacement item priced at 25k.
- Apply the Credit Note - Use the 20k credit note to offset part of the new 25k invoice.
- Settle the Remaining Balance - Receive an additional 5k payment from the customer to settle the new sale.
By following these steps, you ensure that your records accurately reflect all transactions and provide a transparent view of returns and credits.
Creating a New credit note
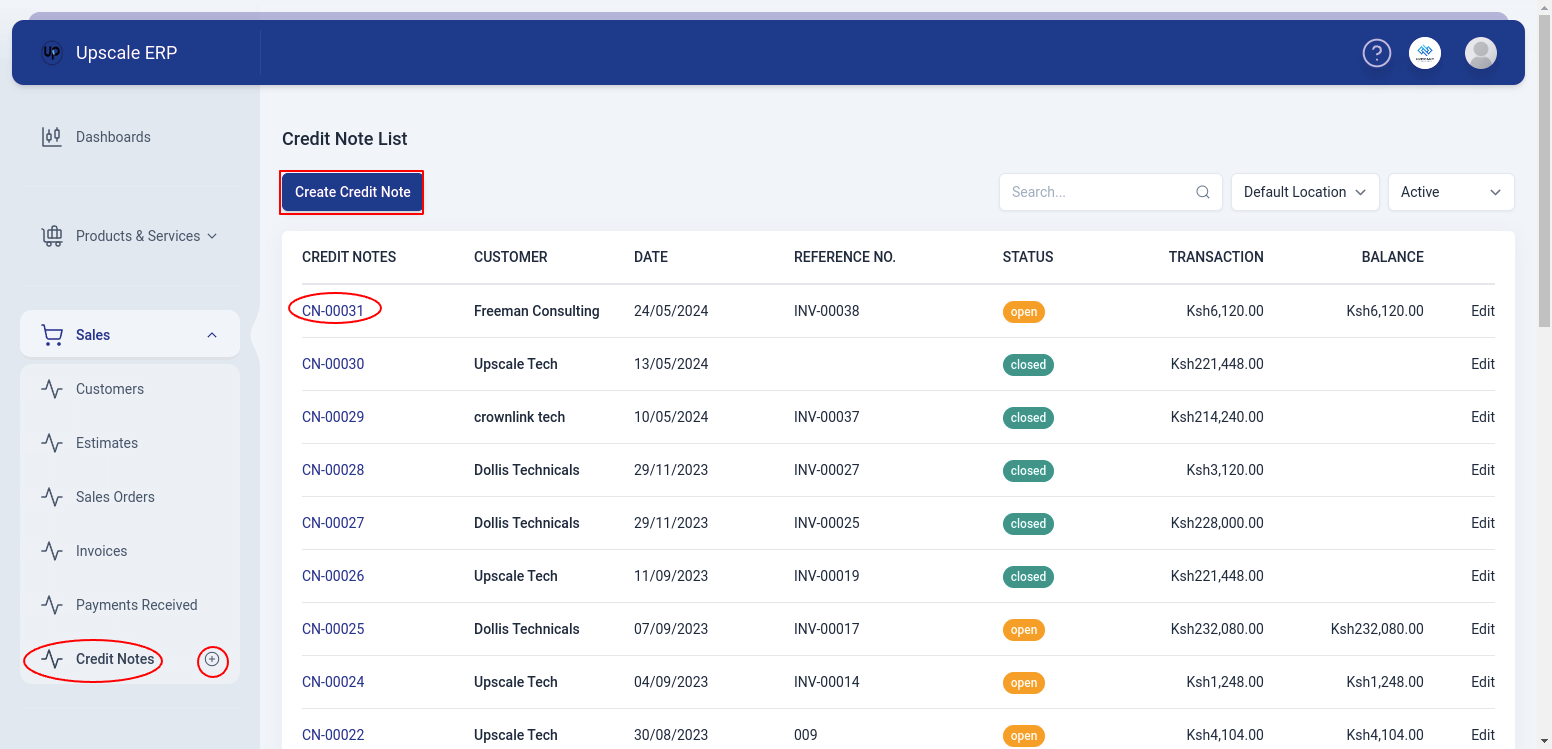
To create a credit note,
Navigate to the Sales module on the sidebar, and click on the 'Credit Notes' section.
Click on the 'Create Credit Note' button on the credit notes list page.
TIP
Alternatively,a shortcut that can be used is to click on the plus sign next to 'Credit Notes' on the side bar and it will take you to the create page.
When you get to the "create" screen, choose the customer, fill in all the other information about the credit note, and choose the items to be credited.
TIP
To include the sales person in this transaction makes sure that the add salespersons option is checked in sales settings . Also check adding salesperson to your organization and generating salepersons report
When you're finished, click 'save' and the status will show open. Alternatively, you may select 'Save as draft' from the dropdown menu if you want to finish the credit note at a later time and the status will show draft.
Viewing a Credit Note
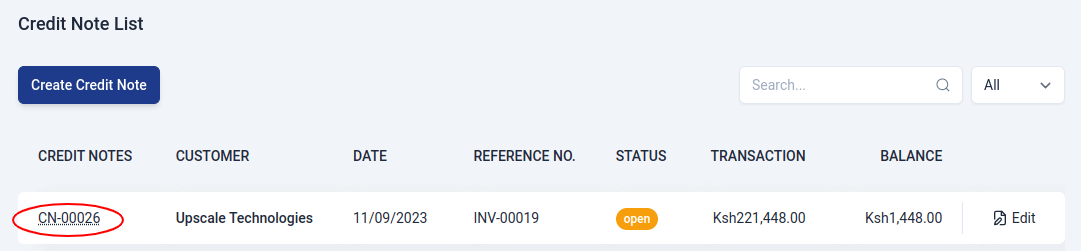
To view a credit note,click on the credit note # on the list page and that will take you to the credit note view page.
The view page has a number of sections that include:
- Customer Details section
This section contains customer contact information.
- Transaction Details
| Field Name | Description |
|---|---|
| Credit note# | This is the document number, which can be either automatically generated or manually entered. |
| Invoice No | The # of the invoice being credited. |
| Credit Note Date | Date order is made. |
| Status | State of the credit note document. |
| Subject | How the goods are to be delivered. |
- Payment Details section
This section contains information about the payment ,for example,the tax on the goods,subtotal and grandtotal,refund and credits remaining.
- Item Details Table
Table that displays a list of items on the credit note,their quantity and amount.
- Invoices Credited
A ledger that presents an extensive history of invoices that have been subject to credit adjustments by way of credit notes being issued.
- Refund History
A table of records that tracks refunds given to customers.
The View Page Features

The credit note view page has a number of features that include:
- New Feature
This feature simply lets the user to create a new credit note.
- Edit Feature
The edit feature lets a user to change details of an already existing credit note.
- Apply to Invoice
Assume you have prepared a credit note for a client. We can now state that you owe the customer the entire amount stated in the credit note, or the "credits" included in it. You can apply these credits immediately to the invoice the next time you make one for the same customer, which will lower the invoice's value. You can partially or fully apply the credit note to any or all of the invoices you have created for the customer.
Learn how to apply credits from Credit Note here
- Print PDF
Print PDF lets a user to download a copy of the credit note to send to the customer.
- Duplicate
This feature enables a user to create a duplicate of the credit note.
- Refund
Imagine you've issued a credit note to a customer. Later, the customer asks for a refund related to that credit note, and you opt to make the refund using a non-electronic method (offline). In this situation, you'll need to process a refund for the credit note.To view refunds made to the credit note,a table called 'Refunds History' can be found above the table 'Item Details'.
Learn how to a refund a credit note here
Deleting a credit note
To delete a credit note,go to the credit note view page,click on the downward arrow and select 'Void Credit ,Note',if sure about deleting the credit note,click ok. The status of the credit note will change to void.
Applying Credit Note To Invoice
To apply credits from Credit Note,
Click on the 'Apply to Invoice' button on the credit note details page.
A list containing paid invoices is displayed in a popup. Enter the payment amount for each invoice or click on 'Credit in full' to apply the full credit note amount to the invoice.
Click on 'Apply Credit' to apply the credit note to the invoice.
Refund Credit Note
To refund a credit note,
Click on the dropdown arrow at the top-right of credit note details page and select 'Refund' from the dropdown menu.
Enter the refund amount, date, payment mode,account to deposit, reference number and description on the popup window.
Click on the 'Refund' button at the bottom to complete the operation.