Appearance
Invoices
Invoices are official documents sent by vendors to their customers, accompanying the delivery of goods or services, and are designed to facilitate the payment process.
To access the Invoices module within the Upscale system, simply navigate to the Sales module on the sidebar and then click on 'Invoices'.
Create Invoice
To create an invoice, follow these steps:
Navigate to the Sales module on the sidebar and click on Invoices.
Click on the Create Invoice button at the top-left of the list page. There's also a shortcut, click on the plus sign (+) next to Invoices on the sidebar.
TIP
Alternatively, click on an invoice number on the list page, which will lead you to the invoice overview page, and click on the New button at the top-right of the invoice details page.
- Once you click on one of the above, the edit page will appear. Fill in the necessary details for the invoice.
TIP
To include the sales person in this transaction makes sure that the add salespersons option is checked in sales settings . Also check adding salesperson to your organization and generating salespersons report
- Save invoice. When saving an invoice, you have these options:
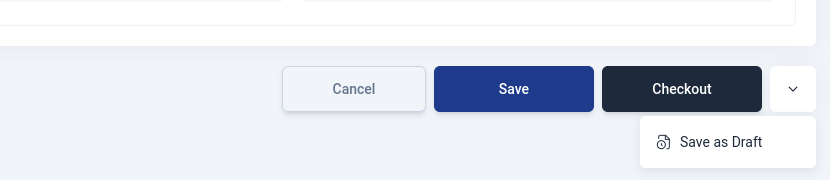
- Checkout Invoice: For transactions already paid by the customer. Save the invoice and record the payment. Click Checkout, select the payment mode in the popup, and apply. You can split payments across different modes.
TIP
You can proceed to checkout with a partially paid invoice or a payment that has an unused balance, but only after acknowledging and confirming a warning message.
Save and Receive payment later (Credit Sale): Click Save to save the invoice as unpaid. Later, create a customer payment by going to Sales > Payments Received here.
Save as Draft: Save the invoice as a draft for later completion.
Cancel: Discard the invoice.
How do Invoices Work?
- Overdue Status:
If the invoice surpasses its due date, its status automatically changes to "Overdue."
- Payment Recording:
Payment recording can be done under 'Payments Received' section under the Sales module for accurate accounting.
- Paid Status:
After payment recording, the invoice status transitions to "Paid", which is reflected in various sales reports.
- Payment Records:
All payments recorded for your customers are conveniently accessible in the Payments Received section under the Sales module.
Navigating Invoices
Invoice List Page
When a user clicks 'Invoices' in the sidebar, it opens a page, displaying a list of invoices created by vendors.
Invoice View Page
Clicking on an Invoice# on the invoice list page, allows users to access more detailed information about that specific invoice on the view page.
View Page Features
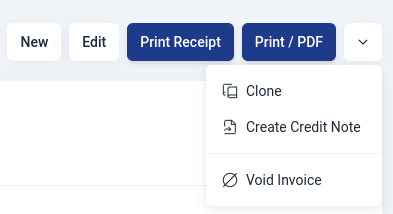
- New
This is to create a new invoice.
- Edit
This feature enables a user to edit a saved invoice as long as the invoice has not been paid or voided.
- Print Receipt
This feature allows vendors to generate and print receipts for customers when goods or services are sold, and full payment has been received.
- Print/PDF
Enables vendors to print and retain a copy of the invoice.
- Duplicate
This feature enables vendors to create a duplicate (clone) of the invoice.
- Create credit note
This allows a vendor to issue a document that formally acknowledges a reduction in the amount owed by a customer for a previously issued invoice. Check the steps for creating invoice credit note below
- Void
This feature permits vendors to void an invoice.
Create Invoice Credit Note
The primary purpose of creating an invoice credit note is to manage and document returned items. When a customer returns a product, the credit note serves as an official acknowledgment of the return and adjusts the customer's account balance accordingly. It helps maintain accurate accounting records and provides transparency in the transaction history.
You can create a credit note for an invoice by following these steps:
Navigate to the invoice details page.
Click on the dropdown arrow at the top-right of the invoice details page and select 'Create Credit Note'.
Fill in the necessary details for the credit note.
Add items to the new credit note by clicking on the 'Add Items' button, then select an item from the input select and enter the quantity. Click on 'more locations to select stock's location. If the added item has a serial number click on 'Add Serial Nos' to add them.
Click on 'save' to save the credit note. You can also 'Save as Draft' to complete the credit note later.
Invoice Fields
In the Upscale system, an invoice encompasses the following fields:
| Field Name | Description |
|---|---|
| Customer | This is where you select the customer to be invoiced from a dropdown menu. |
| Invoice# | This is the document number, which can be either automatically generated or manually entered. |
| Reference# | Unique identification number assigned to a transaction in the system. |
| Invoice Date | Date an invoice is issued |
| Due Date | Latest date for when an invoice must be paid. |
| Payment Terms | Terms of payment agreed upon by the vendor and the customer. |
| Item | This is where you select an item from the dropdown menu. |
| Description | Specifications about the item. |
| Quantity | Number of Items requested by the customer. |
| Rate | Rate at what an item is being sold at |
| Tax | If there is any tax, such as KRA tax applied to the invoiced goods. |
| Customer Notes | Any extra details can be added here. |
| Terms and Conditions | Rules for using a product or service, covering responsibilities, payments, warranties, and more. |
Invoices Statuses
Invoices have various statuses that depend on the actions taken with the invoice.
| Status | Description |
|---|---|
| Draft | Vendor has created an incomplete invoice and it hasn’t been sent to the customer. |
| Sent | Confirms invoice has been sent to the customer. |
| Due | Invoice has an invoice date and payment is expected. |
| Overdue | Invoice has exceeded its payment due date. |
| Partially Paid | The invoice has not been fully paid off. |
| Paid | Invoice has been paid by the customer. |
| Void | Invoice has been voided. |
| WrittenOff | An invoice can be written off only when the amount owed by the customer is uncollectible. |
| Deleted | Invoice has been deleted. |
TIP
Payments Received
After recording payment for an invoice, it will be securely stored within the Payments Received tab under the Sales module. This feature allows you to keep track of all payments made by customers. Learn more about Payments Received
Payments Received List Page
To see a list of all the payments received,click on the 'Payments Received' found under the Sales module .This will display a list of all payments received from customers.
Updating a Credit Sale Transaction
To update payment on a credit sale transaction, go to payments received and create a payment for the item.